










BLACK FRIDAY

2× credits · Ends Dec 1

Ends Dec 1, 11:59 pm PTGrab 2× credits
Photo Perspective Correction

Straighten tilted documents, whiteboards, buildings and horizons. Page corners are found automatically when the edges are clear; drag them to fine-tune or use tilt and rotation, then download a PNG or JPG.

JPG, PNG or WEBP · up to 20 MB

Correction mode

Free · no sign-up · 0 credits

No limit on downloads.

Live preview
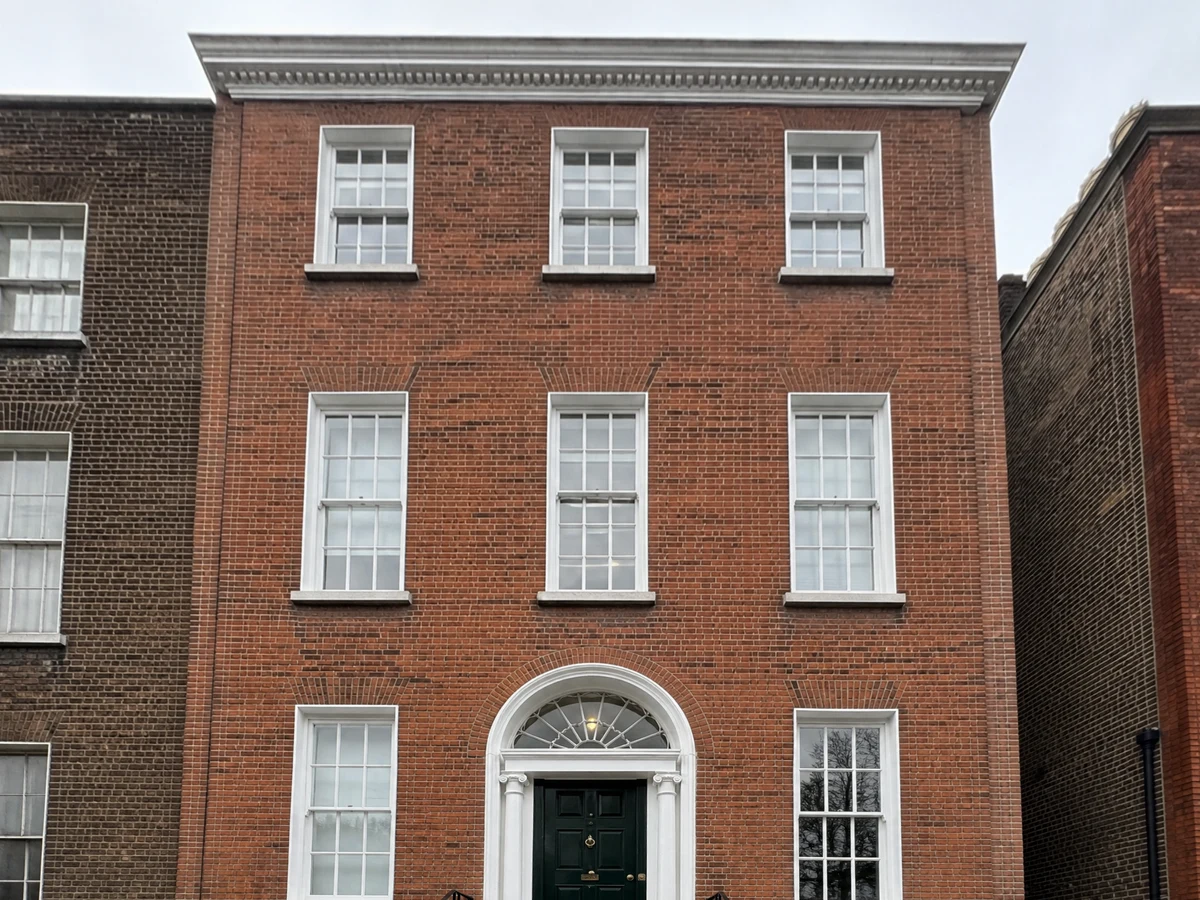
The same townhouse after vertical tilt correction, side walls and window columns upright
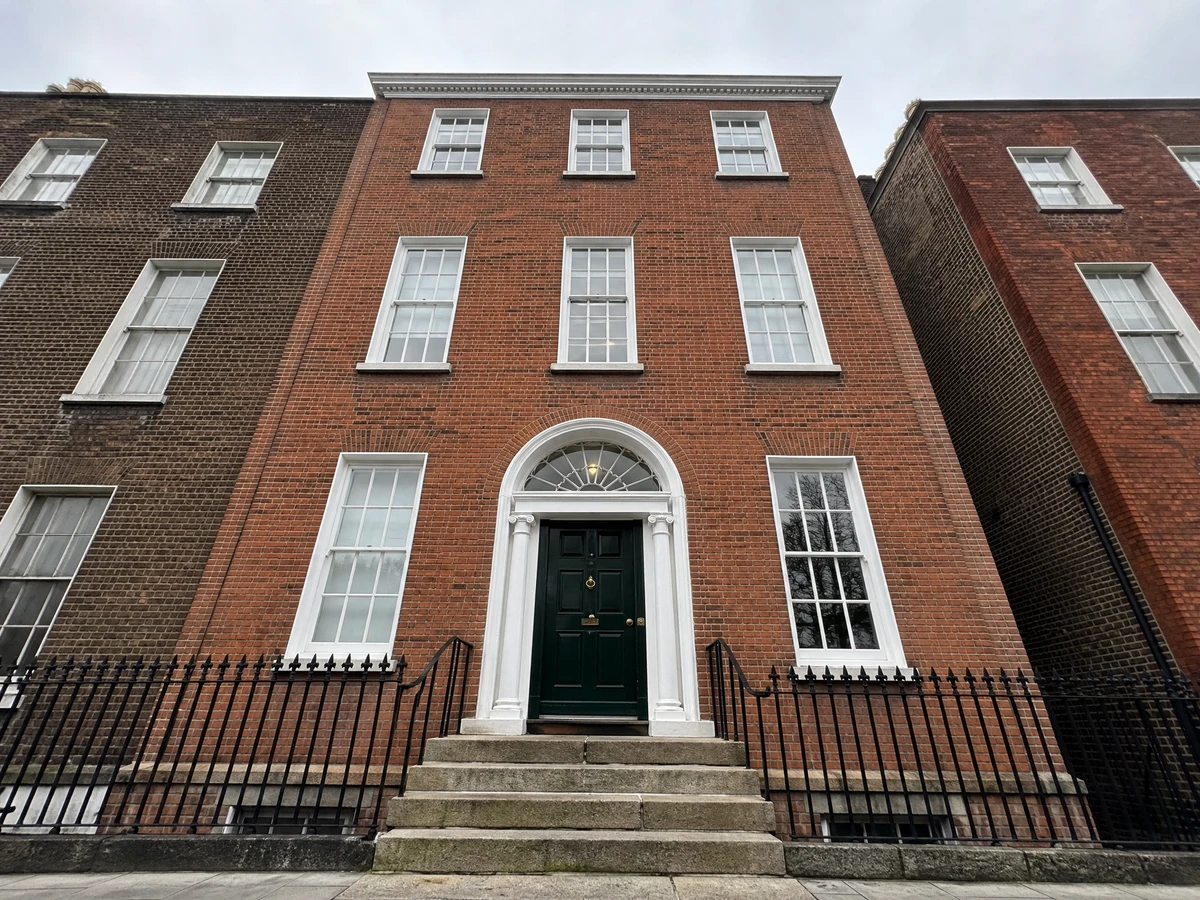
Phone photo of a red-brick townhouse taken from the pavement looking up, both side walls leaning in toward the top
BeforeAfter

More Fixes for the Same Kind of Photo

Other tools in this category, for the next problem in the same picture.

Image Perspective Correction for Leaning Buildings and Skewed Pages

Pull leaning walls upright, square up an angled board and level a crooked horizon in one place

Image perspective correction for phone photos taken at an angle: upload a JPG, PNG or WEBP and the corners of a page, whiteboard or painting are found for you when its edges are clear, ready to drag into place. For buildings and horizons, use the vertical tilt, horizontal tilt and rotation sliders against a grid. Download the corrected photo as a full-resolution PNG or JPG for listings, meeting notes, prints or a portfolio.

Straighten a Photo
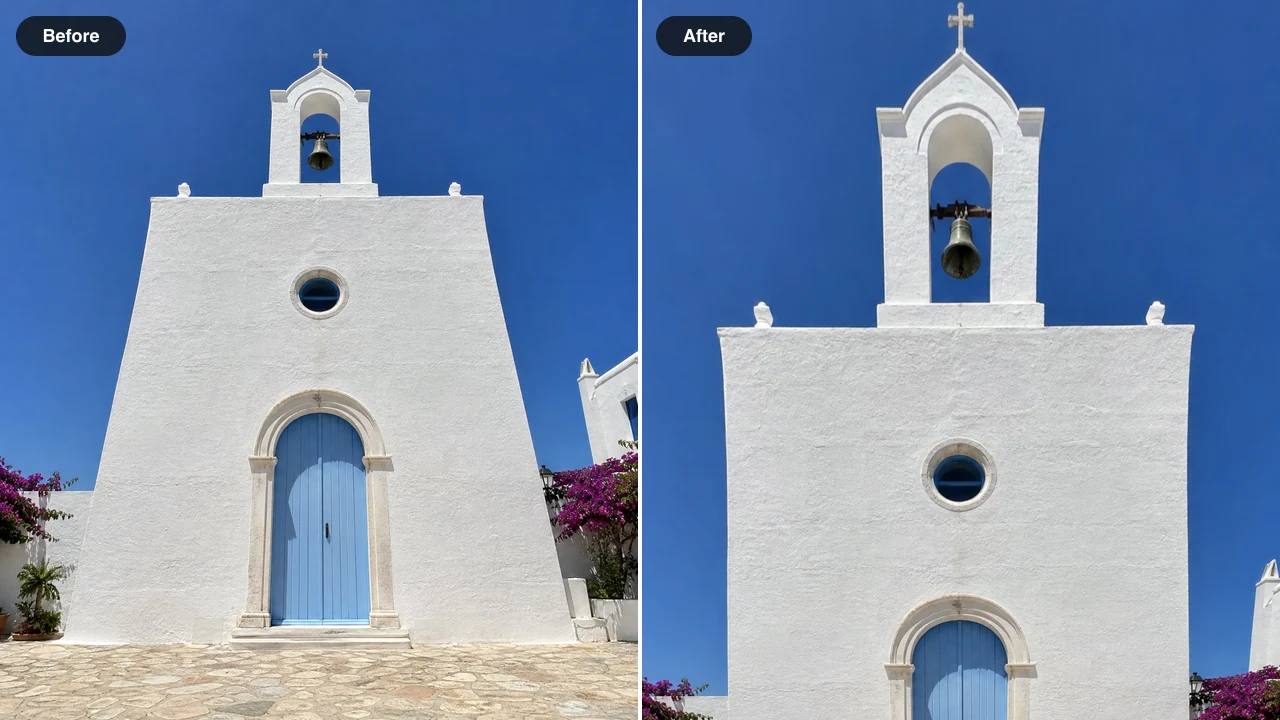
Before and after: a white village church shot looking up with walls leaning inward, then the same church upright
Upright walls with vertical tilt|Page corners you can drag|Rotation in 0.1° steps|Crop to fill or keep the frame

How to Use Image Perspective Correction

Image perspective correction here takes three steps: open the photo, fit the page corners or move the tilt and rotation sliders, then check the result and download it.

1

Upload the Tilted Photo

Drop a JPG, PNG or WEBP of up to 20 MB into the upload box, or choose one from your phone. Image perspective correction works best when the building, page or board has edges you know should be straight. Shots taken square-on to the subject correct with the least cropping.

2

Fit the Corners or Use the Sliders

When the edges stand out, pages, whiteboards and paintings get their four corners placed automatically; drag any corner that misses and the image perspective correction preview redraws. For buildings and horizons, switch to Tilt & rotate: vertical tilt for leaning walls, horizontal tilt for a side-on poster and rotation in 0.1° steps against the grid.

3

Check the Edges, Then Download

Page corners shows the straightened page under your photo; Tilt & rotate lets you drag a compare line over the original. With the sliders, leave Crop to fill on to trim empty corners or switch it off to keep the whole frame. Download PNG or JPG at full resolution; Page corners saves only the page.

AI Fixes for Harder Photo Problems

When a picture needs whiter teeth, a slimmer face, no glare or a corrected number, these AI photo fixers make the edit for you.

Tilt, Corners, Rotation and Crop: What Each Control Fixes

Page corners, the three sliders and the Crop to fill switch each handle one part of picture perspective correction, so you can see which change straightens which edge before you download anything.

Vertical Tilt Pulls Leaning Walls Upright

Tilt a phone up at a tall building and the walls lean toward each other. Vertical tilt widens the top or the bottom of the frame by up to 40 steps, enough range for an apartment block shot from the pavement. With image perspective correction the window frames line up with the grid and a property listing photo looks like it was taken from across the street.
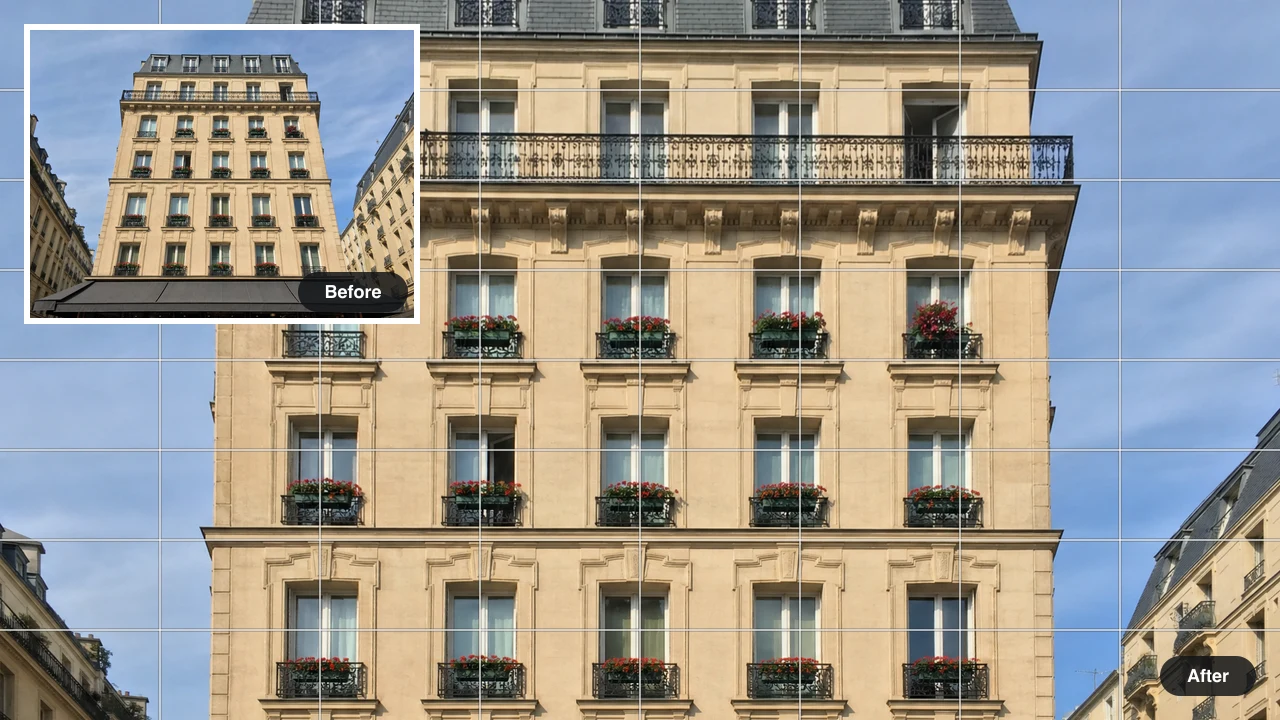
Apartment building after vertical tilt correction, walls and balconies upright on the grid, leaning original inset top left

Horizontal Tilt or Page Corners Square Up Boards

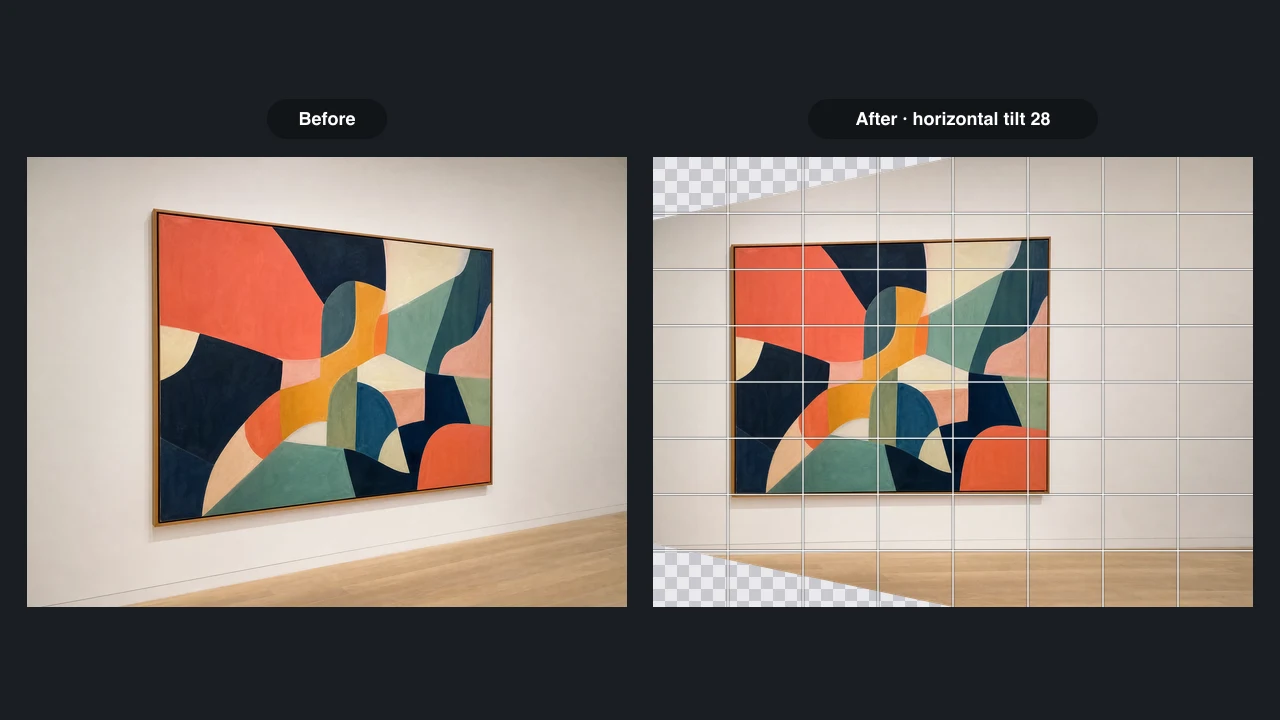
A whiteboard, page or framed painting photographed from one side comes out with one edge shorter than the other. When the edges are clear, Page corners places all four corners and image perspective correction pulls them into a rectangle; drag any corner that misses. Horizontal tilt stretches the short side back by hand. Straighten a page here first, then make it look scanned in Photo to Scan.

Framed painting shot from the side on the left; on the right the same painting squared up, both edges level on the grid

Rotation in 0.1° Steps Levels the Horizon

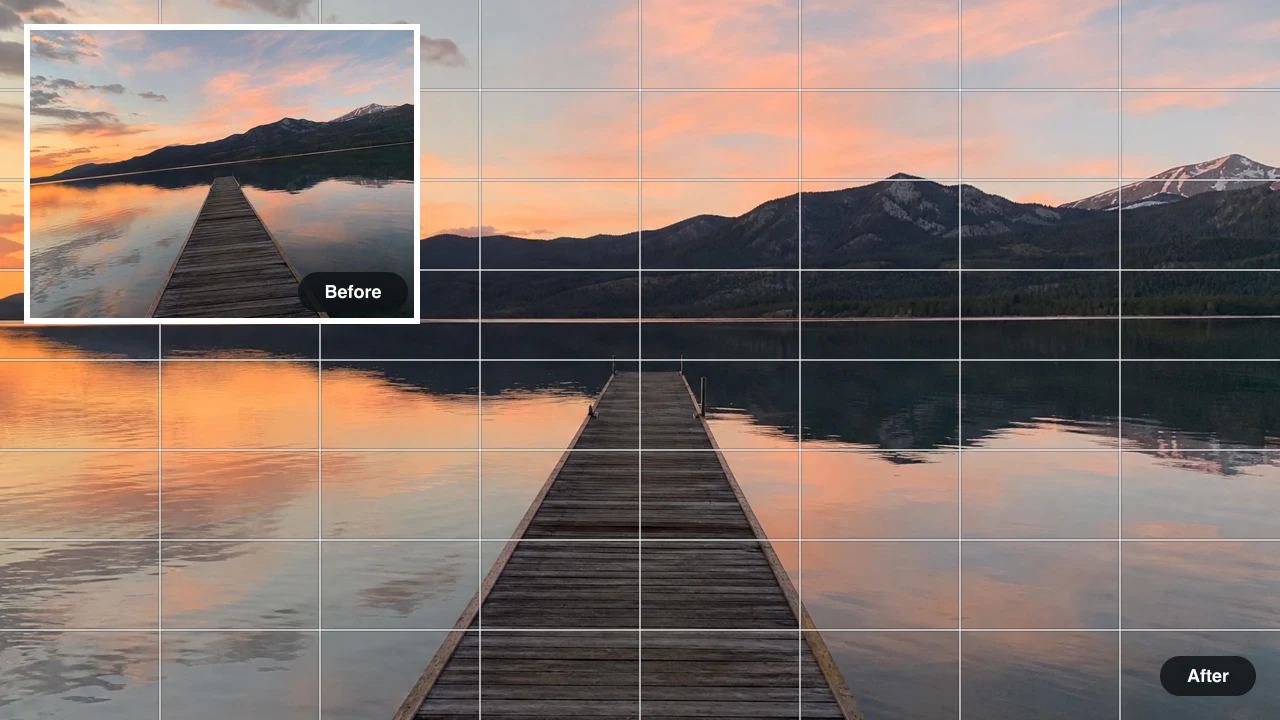
Seascapes, street scenes and product shots can lean by just a few degrees. Rotation goes from −45° to 45° in 0.1° steps, and the grid gives you a straight line to match the horizon, a shelf or a pier against. Fine steps let image perspective correction level a photo without overshooting, so the tilt disappears instead of flipping to the other side.

Lake pier at sunrise after a 6 degree rotation, shoreline level on the grid, sloping original photo inset at top left

Crop to Fill or Keep the Whole Frame

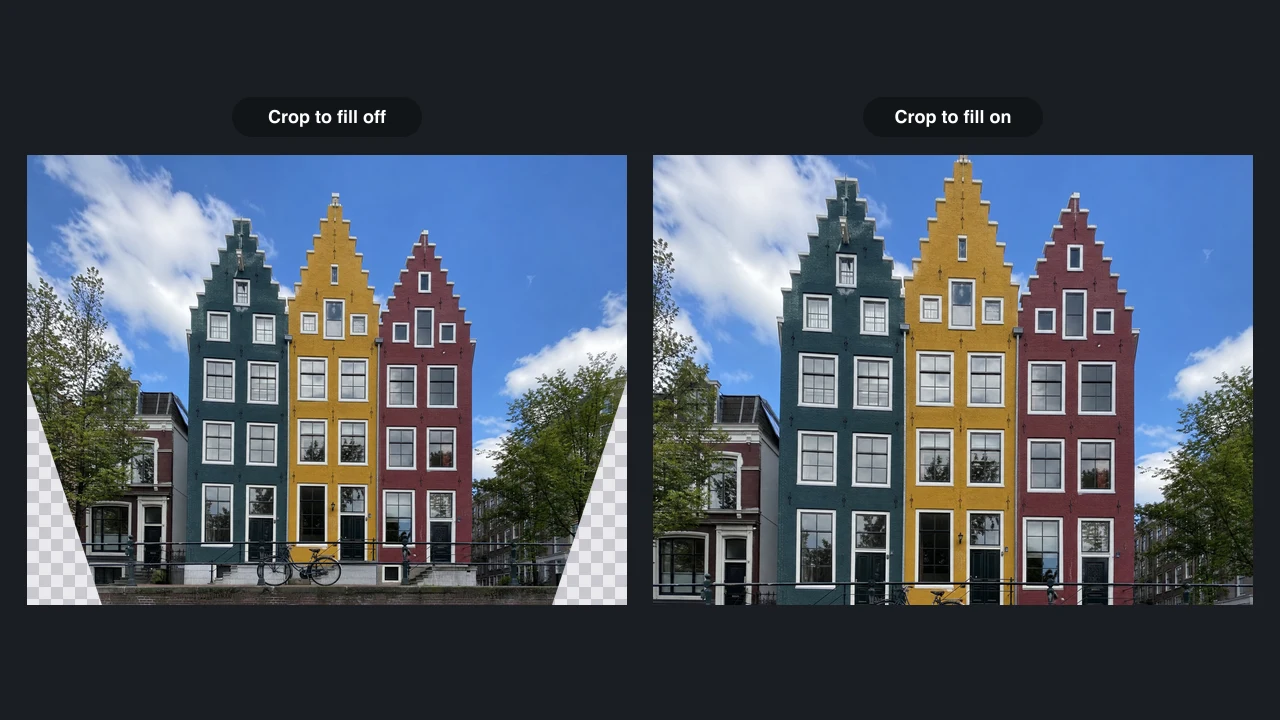
Every perspective change leaves empty wedges at the corners. With Crop to fill on, the tool cuts the largest clean rectangle in the same shape as your photo and scales it back to full size. Switch it off and the photo perspective correction keeps every part of the frame, with transparent corners in a PNG that you can fill or crop in another editor later.

Upright canal houses twice: Crop to fill off with checkerboard transparent corners on the left, on with a full frame right

Where Picture Perspective Correction Helps

People reach for picture perspective correction when a photo is good except for the angle: a house for sale, a board after a meeting, a painting or a holiday horizon.

Property and Rental Listings

Agents and landlords who shoot a house from the pavement use image perspective correction to pull the walls upright before the photo goes on a listing site. Straight verticals make rooms and facades look the way buyers see them in person, and the full-size JPG drops straight into the listing form.

Whiteboards and Slides from Your Seat

Students and team leads photograph a whiteboard or projected slide from wherever they sat, then fit its corners and square it up. After image perspective correction the diagrams read straight on, so the photo can go into class notes, a shared channel or a project document without anyone tilting their head.

Artwork and Products for Online Shops

Painters, makers and small shop owners who photograph a canvas or a boxed product at a slight angle fix the keystone and level it before uploading. Image perspective correction keeps the frame rectangular, so a print listing or portfolio page shows the piece the way it hangs on a wall.

Travel and Architecture Photos

Travellers level crooked horizons on beach and harbour shots, and architecture fans straighten cathedrals and towers taken from street level. Rotation in 0.1° steps and vertical tilt give fine control, and the corrected photo downloads at full size for prints, albums or a photo blog.

Image Perspective Correction Stories from Real Photos

Narrow streets mean I shoot most terraced houses from the pavement, and the walls always lean. Image perspective correction with vertical tilt at around 35 pulls them upright before I upload the listing, and the listing photos finally match the house buyers see when they arrive for a viewing.

Harriet Vossberg
Lettings Agent

Image Perspective Correction FAQ

Straight answers about photo perspective correction: what it fixes, what it does automatically, which sliders to use for buildings, and what the download contains.

Image perspective correction is an edit that makes lines which should be straight look straight again. It straightens leaning walls, boards shot from the side and tilted horizons, either by pulling a page’s four corners into a rectangle or with vertical tilt, horizontal tilt and rotation.

Yes — the image perspective correction tool finds the corners of a page, whiteboard or painting with clear edges. Drag any corner to fine-tune. If none are found, Tilt & rotate opens, though you can still place corners by hand. Buildings and horizons, facades included, suit the sliders.

Open Tilt & rotate and raise vertical tilt until the walls line up with the grid. If the whole building still leans left or right, add a little rotation. Keep Crop to fill on to remove the empty corners, compare with the original and download the straightened photo.

Upload the photo here, then adjust the corners it finds or use the tilt and rotation sliders. The photo perspective correction is free, with no sign up and no login, and there is no limit on photos, so you can straighten a whole set of shots in one sitting.

Yes — the download is rendered from your photo at full resolution, not the preview. Page corners saves the page at the size its edges measure, capped at the photo’s pixel count. Crop to fill scales the trimmed area back to full size, so strong corrections look a little softer.

Transparent corners appear when Crop to fill is off. Picture perspective correction moves the edges of the frame and leaves wedges with no photo in them; a PNG keeps them transparent, a JPG fills them with white, and turning Crop to fill on trims them away.

No — image perspective correction adds no logo or stamp to the PNG or JPG. The file you download is the straightened photo alone, at full resolution, ready for a property listing, a shared meeting document or a print shop.

Start Image Perspective Correction on Your Photo

Image perspective correction in one place: upload a photo of a page, board, building or horizon, adjust the corners it finds or move the tilt and rotation sliders, check the edges and download a straight PNG or JPG. Begin with the photo that came out crooked.

Correct My Photo
Museum portico with eight upright white columns after perspective correction, square crop